
I am totally a second hand mommy. I belong to every buy-sell-trade group in the tri-county area. Especially when it comes to things for my little rascals who outgrow and, honestly, have a tendency to destroy everything! (My boys are currently in 5T and 6/7 in case you have any hand-me-downs to pass on!)
So when I was looking for a bunk bed, I scoured Facebook Marketplace to find the best deal. And I found it! But as noted above, kids tend to destroy things. So I had to scrape a little bubble gum off and the board under the top bunk was drawn all over by the previous little rascal that owned it. (It feels good to know mine are not the only ones.)
But not to worry, it wasn’t anything some fabric, a hot glue gun, and a little creativity couldn’t handle. Whether you are covering up an old bunk bed or amping up a new one, this is a super fun, cheap, and easy craft to make your kid’s bunk bed out of the this world!
Introducing…
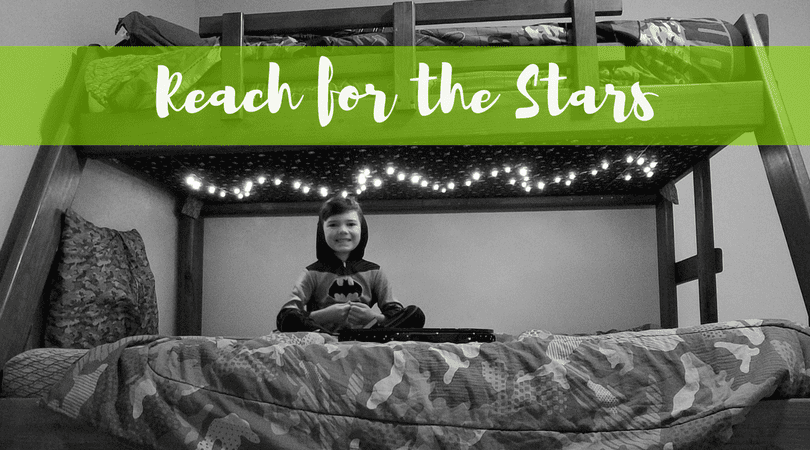
The Under the Bunk Bed Outer Space Dream Starry Night Light!
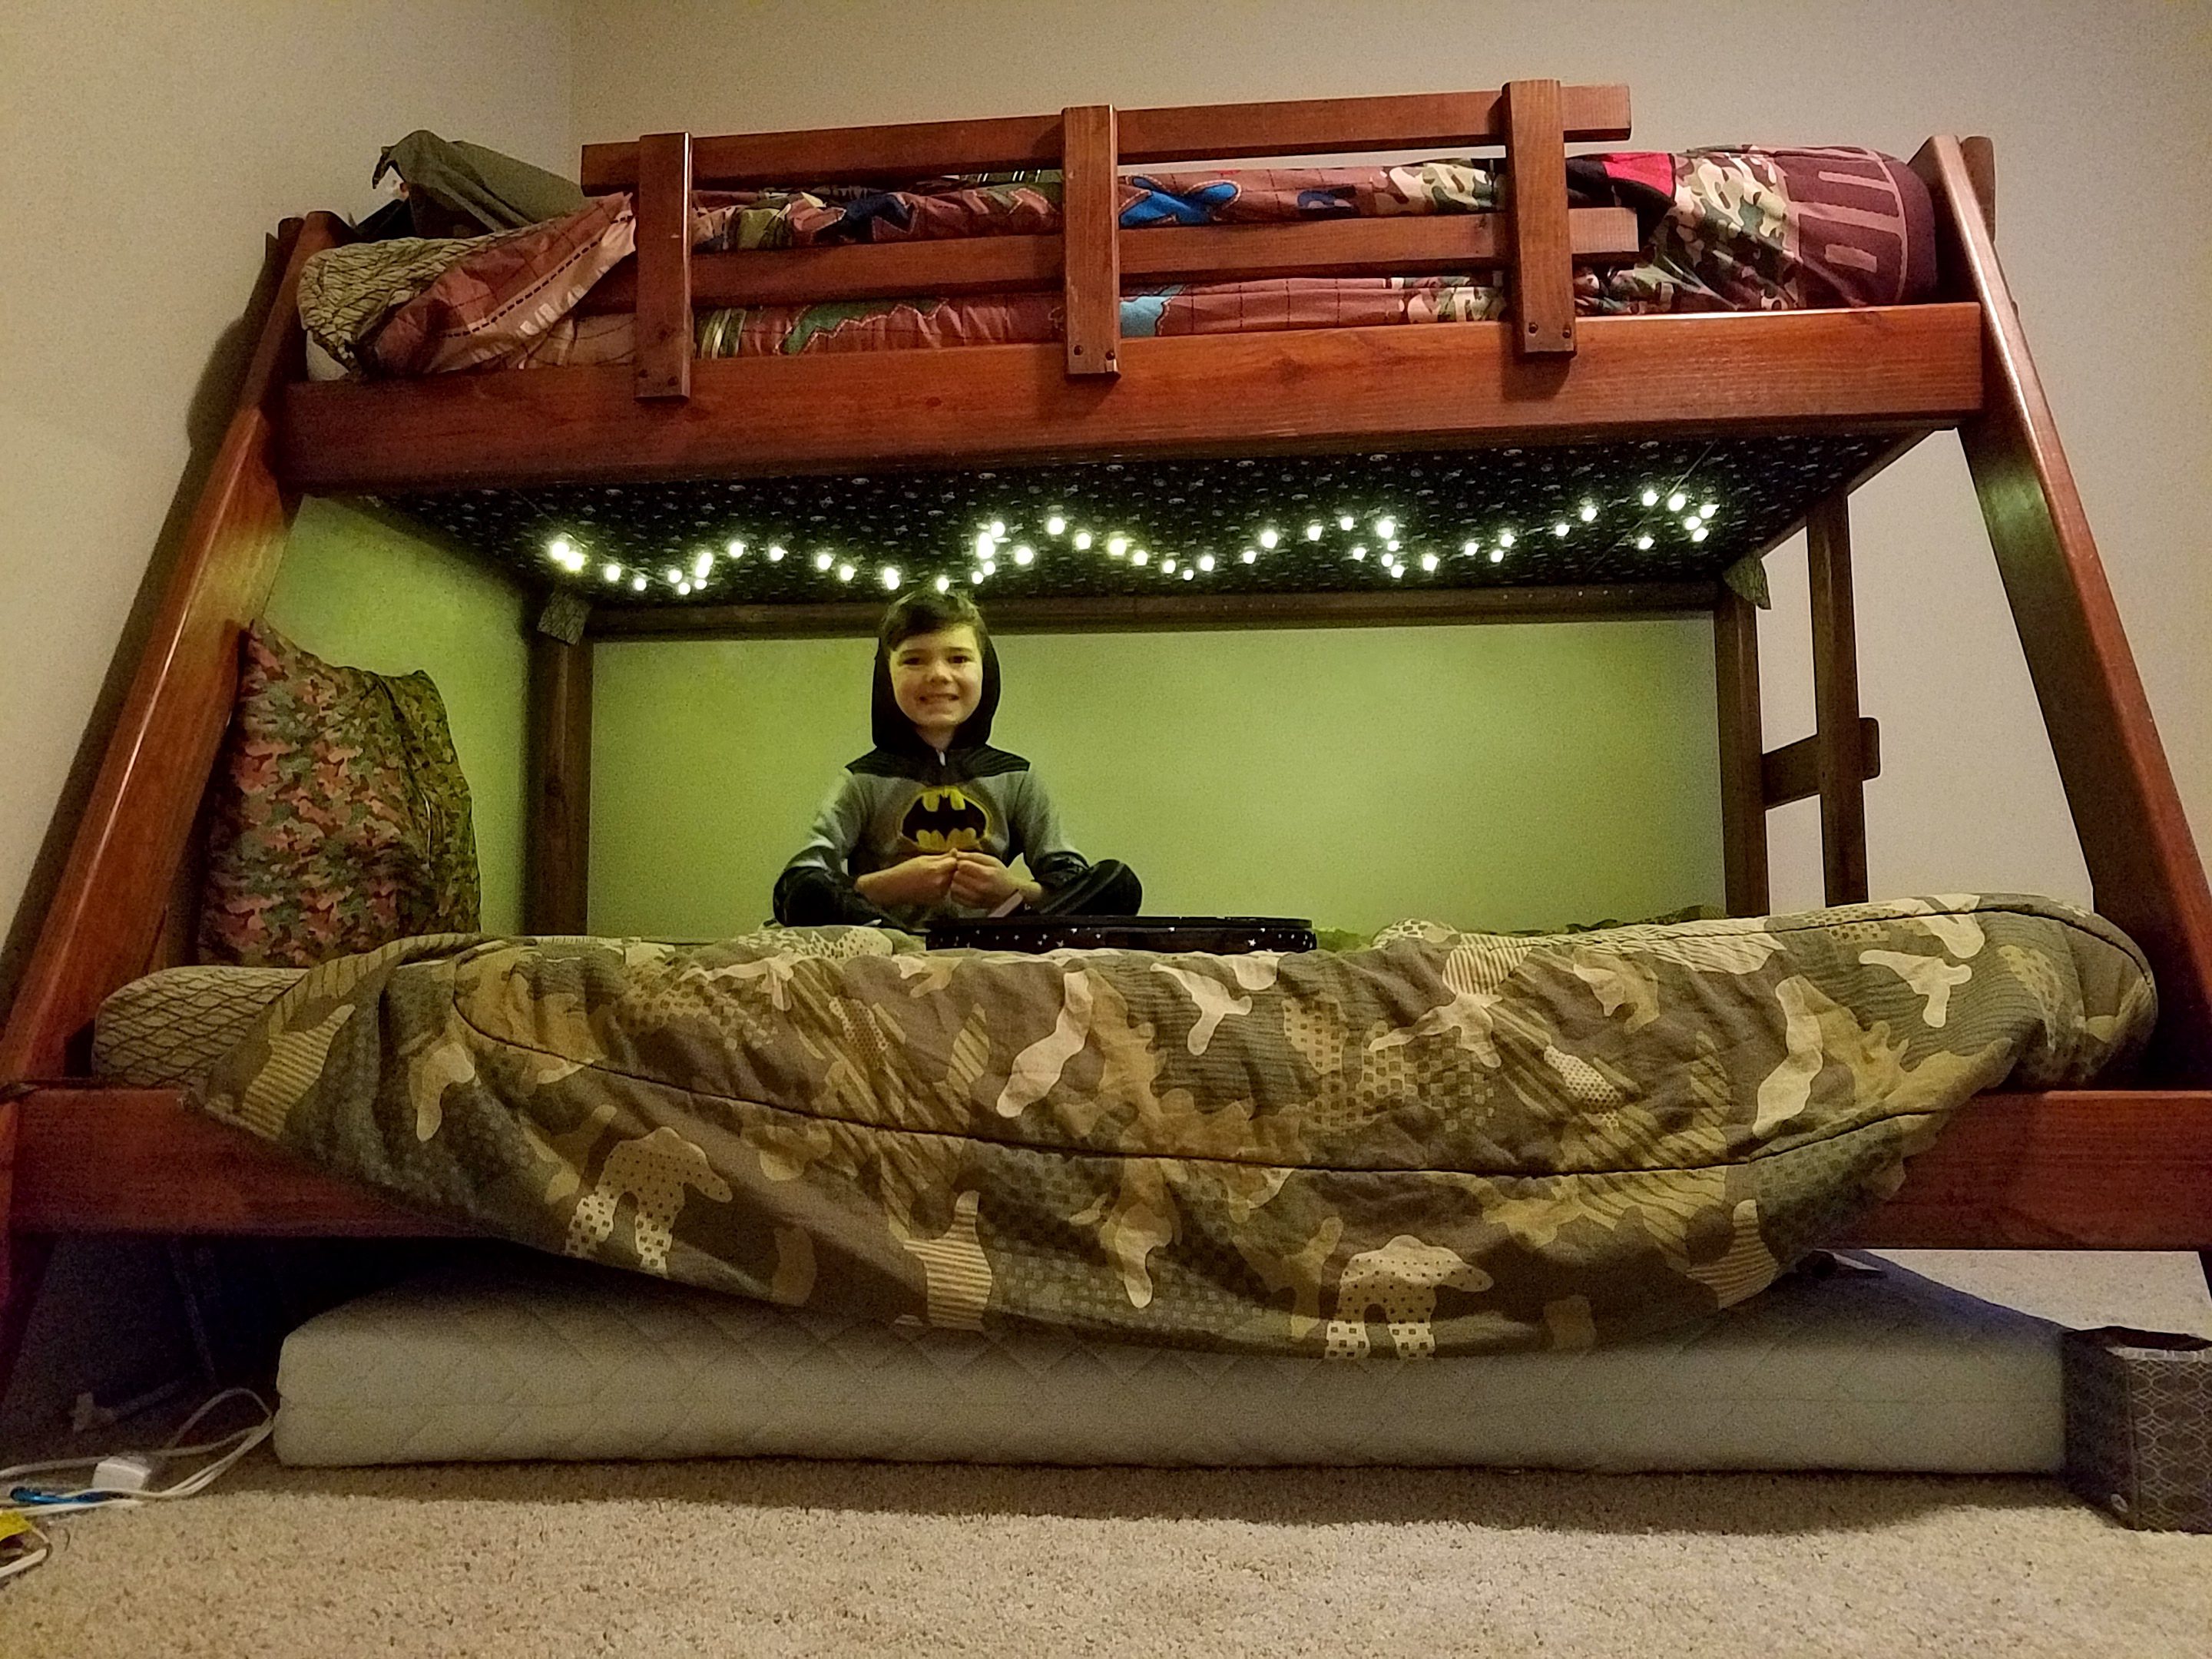
Don’t mind the mess under the bed. This is real life, ya’ll!
Here’s how I did it…
- Pick out your fabric
- There are so many fun patterns you can choose from based on your child’s faves. You can do clouds, rainbows, airplanes, animals, or of course their favorite character. In my house, the favorite character changes with the wind, but they always love space so I went with a simple and timeless black and white outer space pattern. And I was surprised later to find out the planets and stars glow in the dark. Bonus!

Stars, moons, and planets… everything a little kid love!
SIZE: I bought 7’ of fabric to give it slack to wrap around. Make sure it is at least 44” wide. Twin beds are typically 38”x75”.
- There are so many fun patterns you can choose from based on your child’s faves. You can do clouds, rainbows, airplanes, animals, or of course their favorite character. In my house, the favorite character changes with the wind, but they always love space so I went with a simple and timeless black and white outer space pattern. And I was surprised later to find out the planets and stars glow in the dark. Bonus!
- Find the right lights
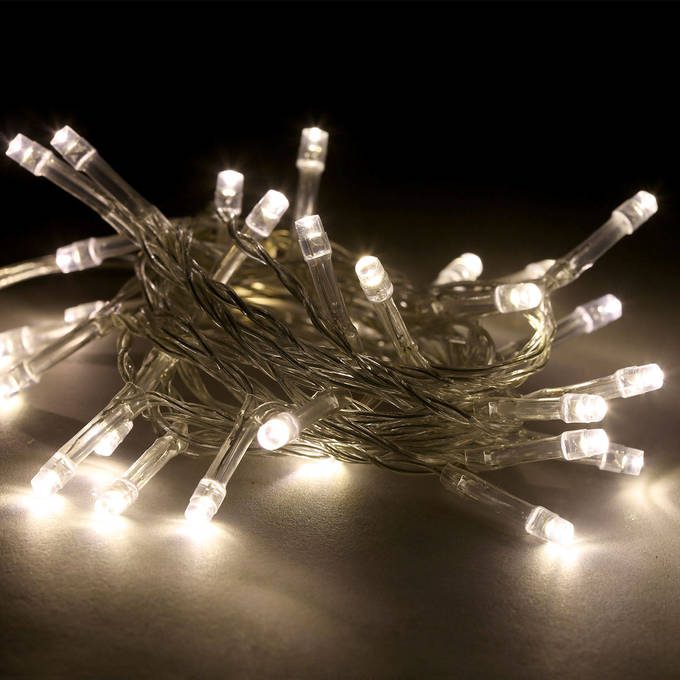
- I bought a 100 count LED string of lights with wall plug. I didn’t want to be blowing through batteries when my kids leave them on over night and I know LEDs use very little energy. Plus I really like the look of the little domes vs. the classic long pointy ones. Also, I picked 100 count so it was a decent amount of light but not blindingly bright like a 300 count strand would be. It was hard to find the right set, so I made it easy for you! Buy this one on Amazon. You will also need a simple extension cord to reach to the wall plug.
Star light, star bright, these are perfect LED lights!
- I bought a 100 count LED string of lights with wall plug. I didn’t want to be blowing through batteries when my kids leave them on over night and I know LEDs use very little energy. Plus I really like the look of the little domes vs. the classic long pointy ones. Also, I picked 100 count so it was a decent amount of light but not blindingly bright like a 300 count strand would be. It was hard to find the right set, so I made it easy for you! Buy this one on Amazon. You will also need a simple extension cord to reach to the wall plug.
- Gather supplies
- Dust off your hot glue gun, load up your staple gun, and sharpen your X-Acto knife. Who doesn’t love a craft that requires weapons?! (NOTE: I did this while my kids were sleeping as a Christmas surprise so they were not around these dangerous tools!)
- Get crafting!
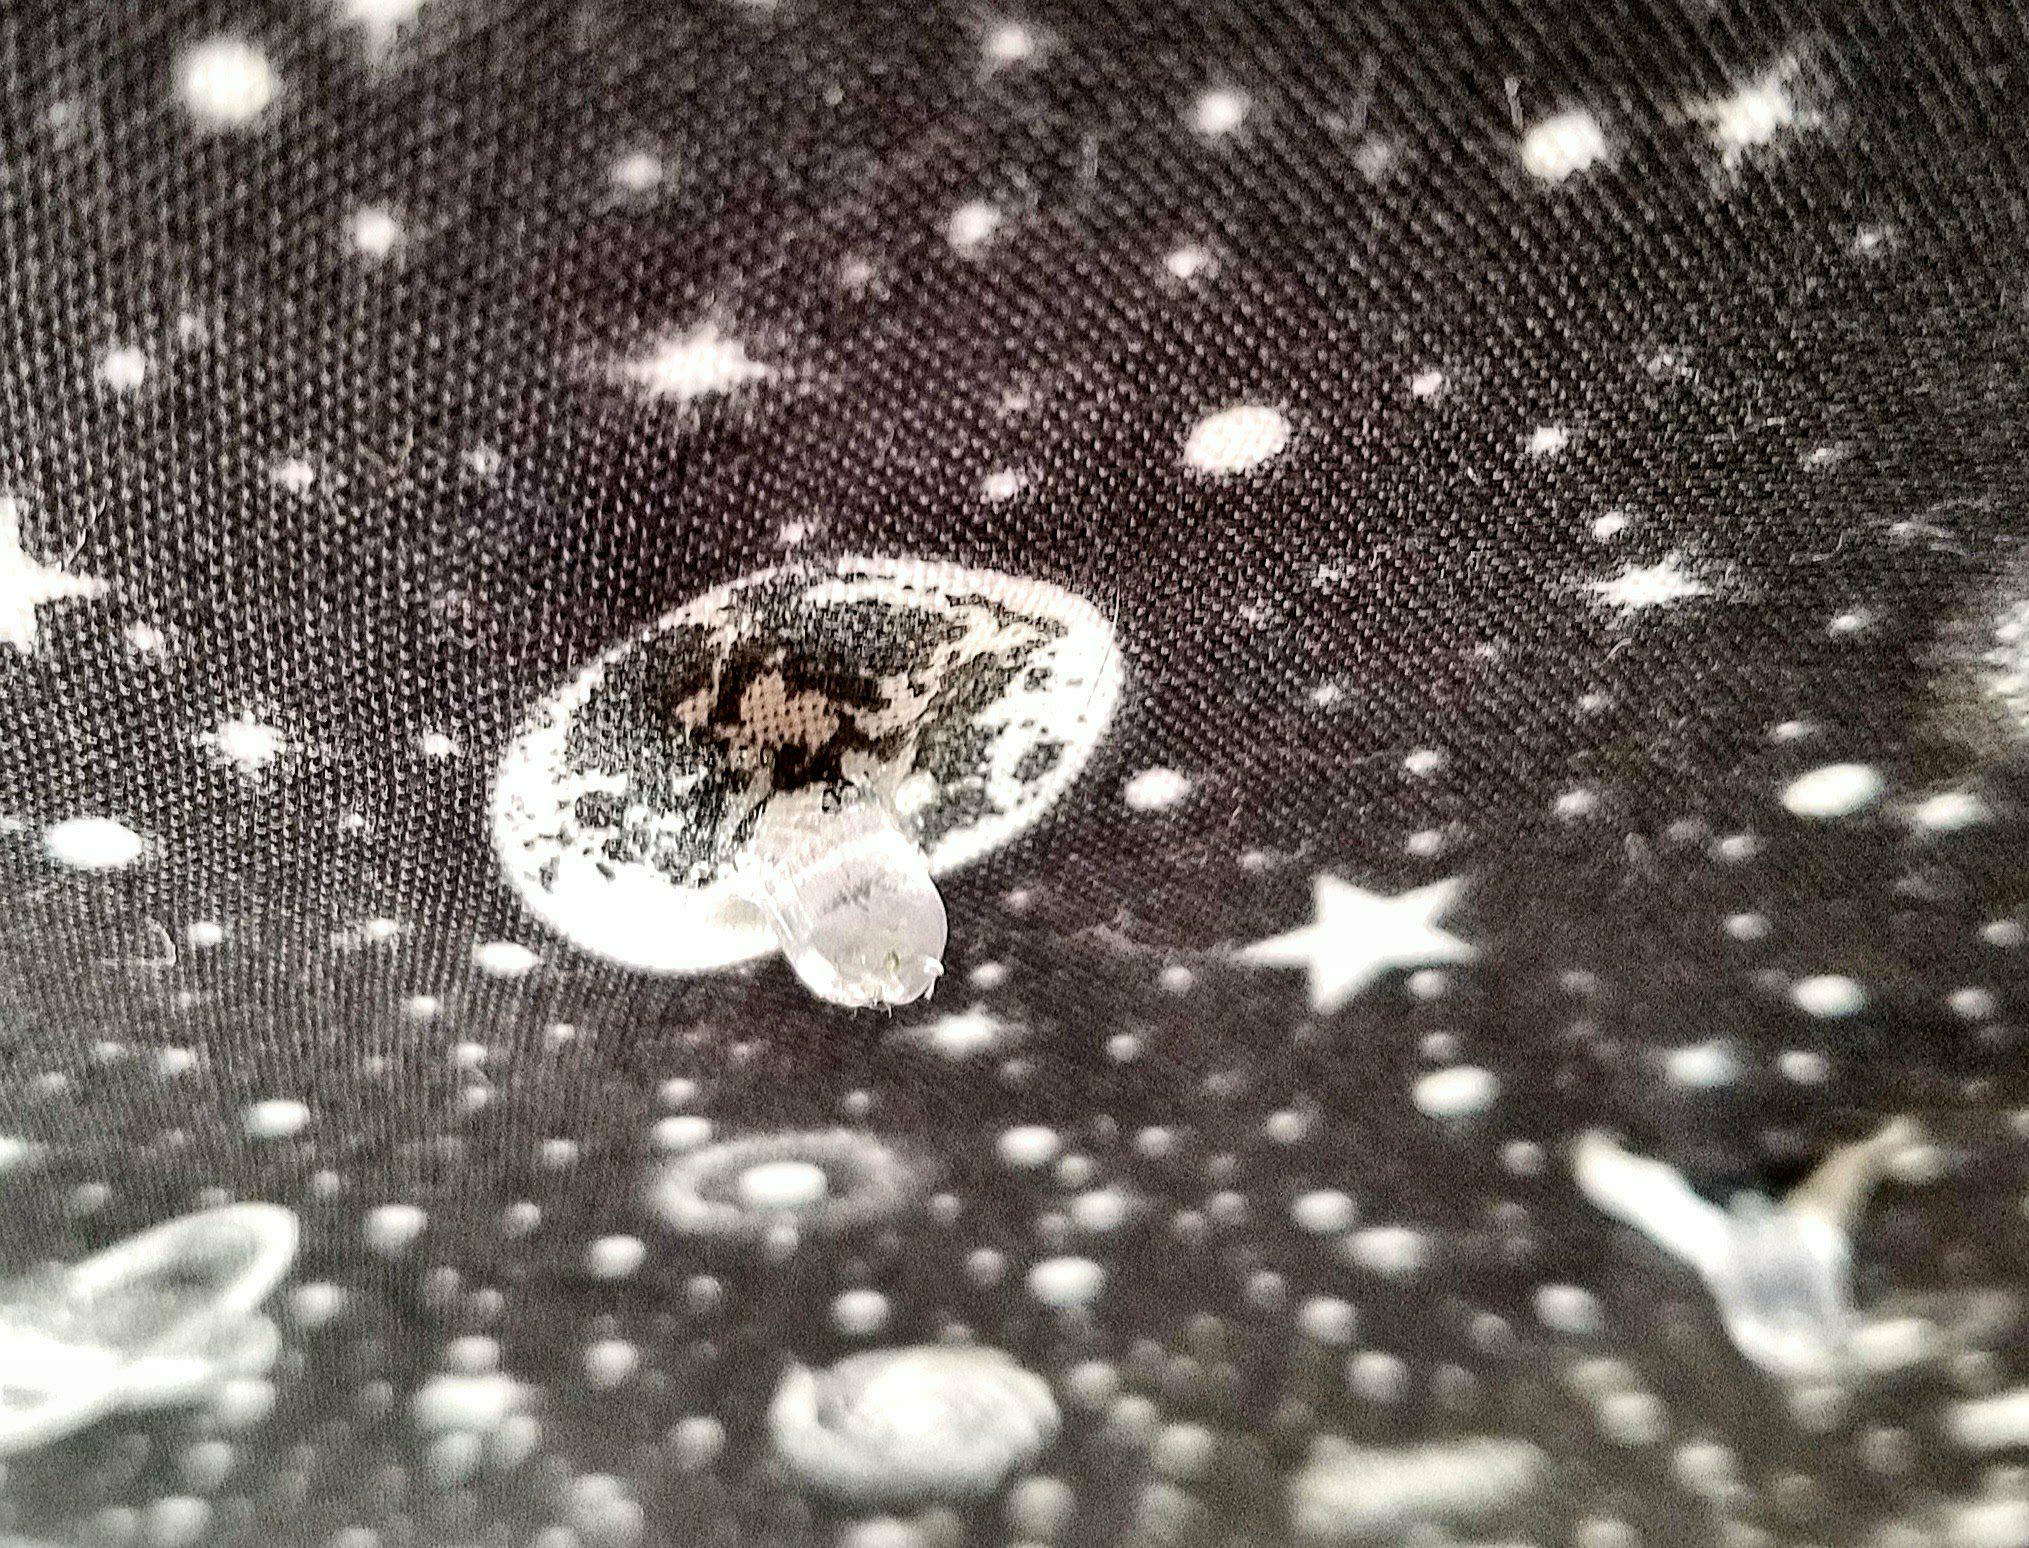
- Start by laying out your fabric upside down on a large surface with a piece wood or something else to protect the surface from your X-Acto knife. Make sure the bottom side is up.
- Stretch out the light string across your fabric. I taped it in place on the fabric in a zig-zag form so I knew the lights would be evenly spread across the entire length. The plug end of the string will go out the short end of the bed.
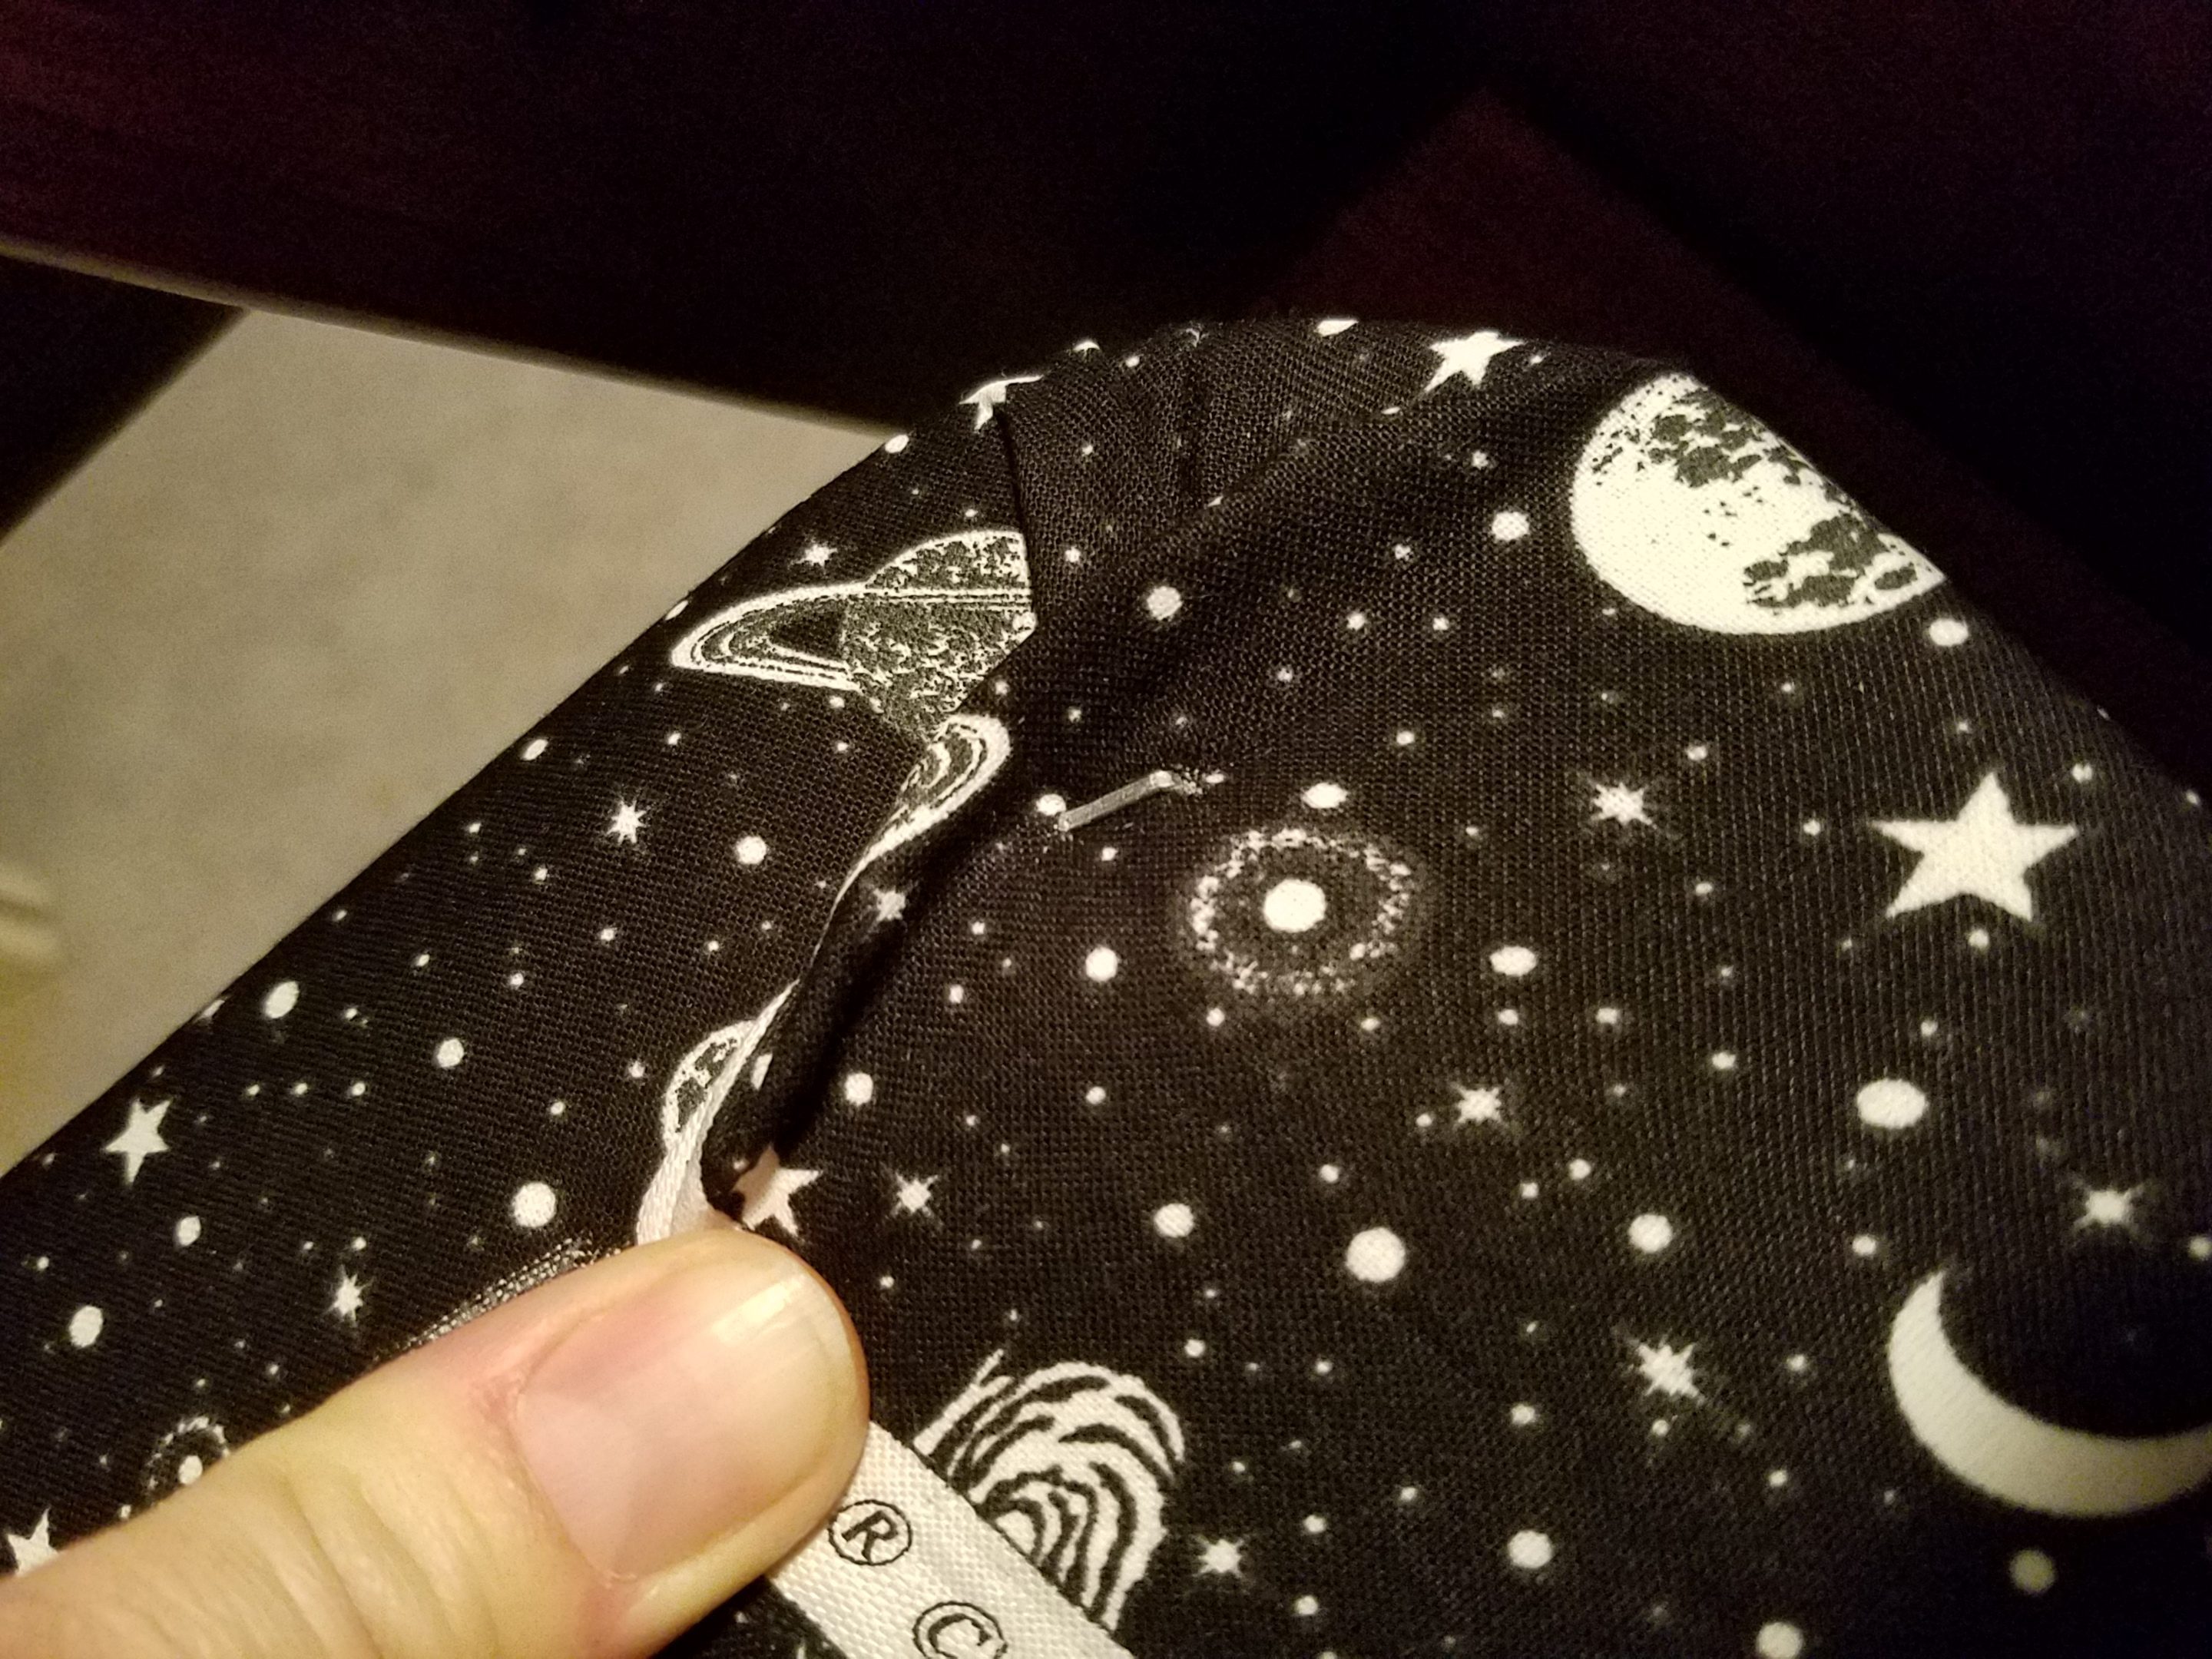
- Grab the first light and decide exactly where you want it to poke through the fabric. I chose to have them right in the middle of the stars and planets on my fabric. Use the X-Acto knife to slice a small hole, slightly smaller than the diameter of the light. Apply a circle of hot glue on the hole. Then push the light through the hole, making it nice and snug and secured with the hot glue. This also prevents the cut fabric from fraying. Repeat x 99 more lights!
Hot glue also prevents the cut fabric from fraying.
- Attach to the bed
- Once the lights are all in place, take the board from the top bunk and lay it on top of the fabric. The light string will be between the fabric and the board. Stretch the fabric around the board and use the staple gun to secure it in place. You will feel like you’re on an HGTV home improvement show during this part!
Pull it REALLY tight so there is no sagging.
- Once the lights are all in place, take the board from the top bunk and lay it on top of the fabric. The light string will be between the fabric and the board. Stretch the fabric around the board and use the staple gun to secure it in place. You will feel like you’re on an HGTV home improvement show during this part!
- Voila!
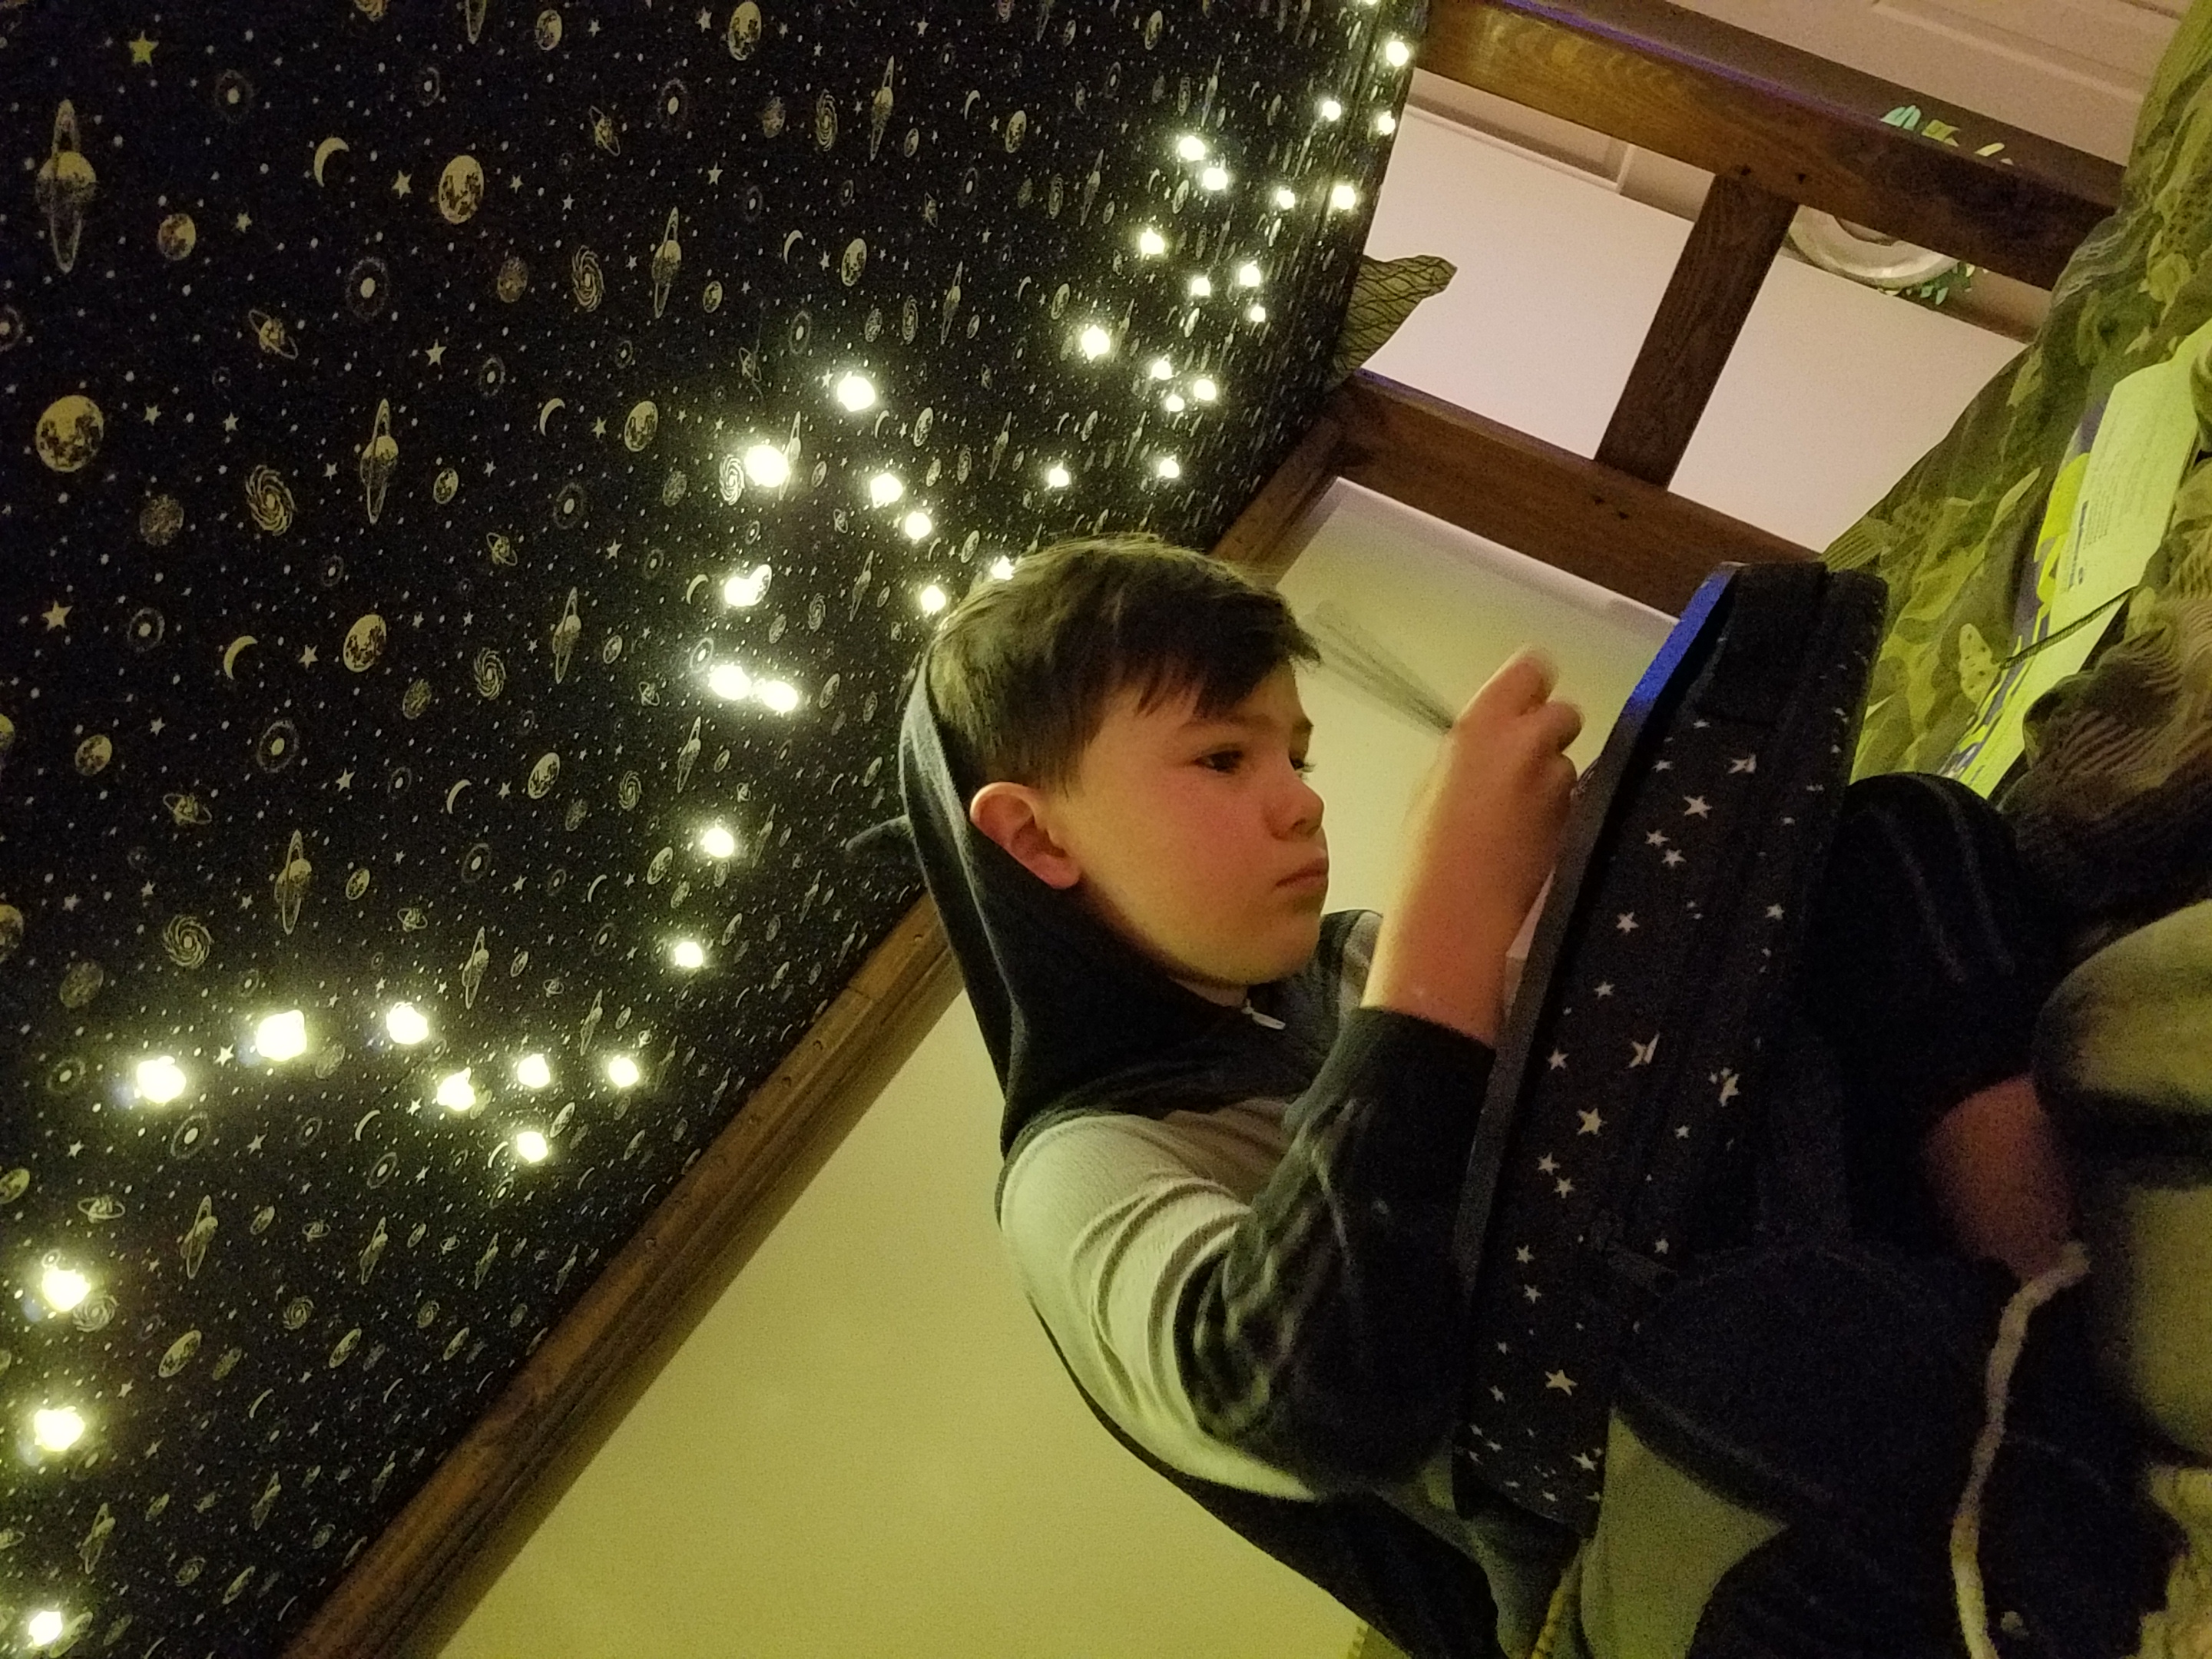
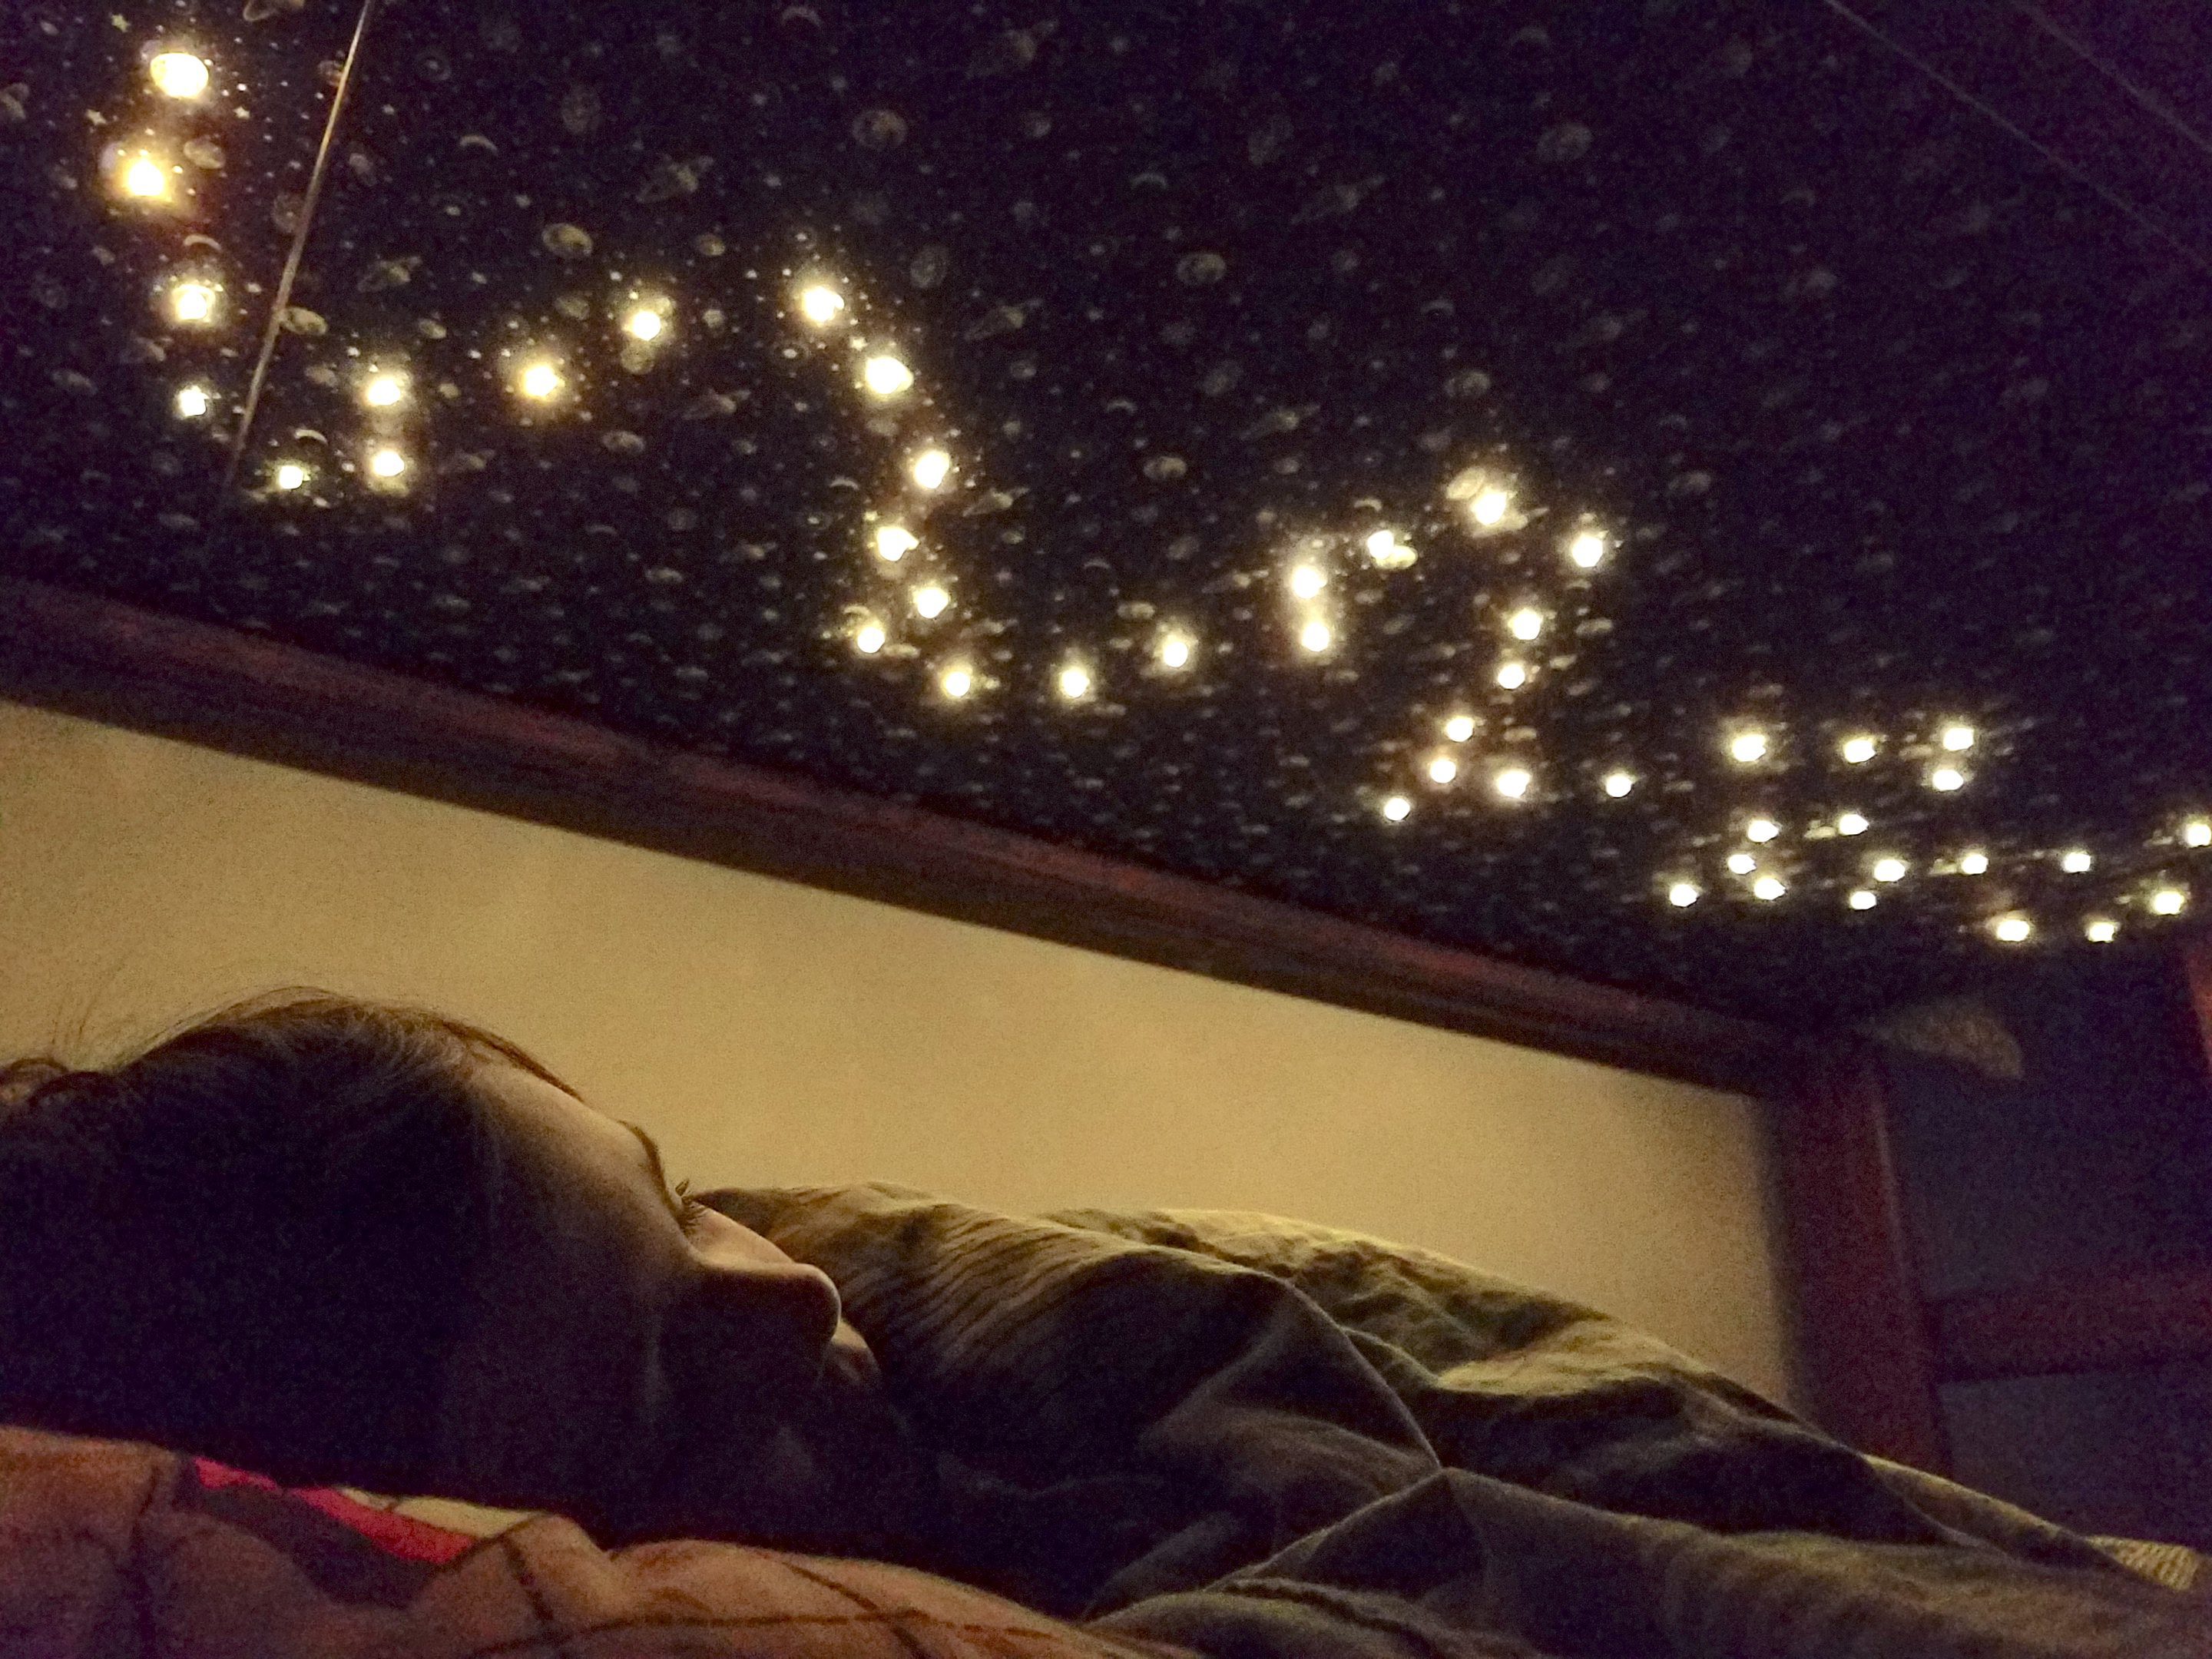
- Put the board back in place under the top bunk mattress and VOILA! Your child now has a starry sky to stare at and dream of adventures in space.

A few bonus tips for even more awesomeness-
- You can also get add a timer (like what you use on Christmas lights) so that the lights turn off automatically after the child falls asleep.
- Adding a dimmer like this one will allow your child to make them bright for reading then tone it down when falling asleep.
Hours of drawing happen under here!
Speaking of reading! My son loves his lights because he loves to read and draw in bed before falling asleep. I found this fabulous little lap desk for him with matching black and white stars! It used to be so dark under his top bunk, even with the over head light on, which as my mama always told me, puts a strain on his eyes. So I love that I can turn out his over head light, turn on his dreamy star lights, activate the timer, and kiss him goodnight.
Sweet dreams future space explorer!
I hope you love this simple and cheap craft as much as I did. If you make it, I want to see a photo!
Pin this blog

Error: No feed found.
Please go to the Instagram Feed settings page to create a feed.

Any idea how long it takes to charge the glow in the dark fabric?
Hi Sean! The fabric charges up pretty quickly, but we’ve found that it requires direct light exposure in order to charge. Since its under a bunk bed and mostly seen after sun down, the glow in the dark fabric is not effective. BUT! The 4″ path around where the twinkle lights are always glows right when we unplug them and that looks cool.